
It is never too late to switch from skiing to snowboarding. Here are some great tips to help you get started.
Our winters in Whistler are traditionally in the name of play! We consistently get so much snow to the point that we hardly rest. Some of us dig deep into snowmobiling in the backcountry, and some of us are learning how to switch from skiing to snowboarding. And that is exactly what we will talk about today if you are “flirting” with the idea of trying snowboarding too. It is never too late to try new things and the softer the snow in Whistler gets, the better it is for learning to snowboard!
Why Switch to Snowboarding?
• Going through new challenges means that you are growing and once you get the basics under your skin, it is so much fun to do a new activity! “Get out of that comfort zone – would ya?”
• Balance, balance and again balance! Not just for life in general, but this activity really forces you to align your body properly (so you don’t fall). Engaging your core is very important in snowboarding, so you get two benefits in one.
• Snowboard boots are the best thing ever! Ok, maybe not as comfy as flip-flops, but definitely much much better than those robot ski boots!
• Being able to do both, skiing and snowboarding brings a great advantage as you can switch depending on snow conditions. Riding powder on a snowboard is hard to beat!
Starting Tips
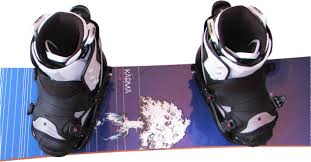
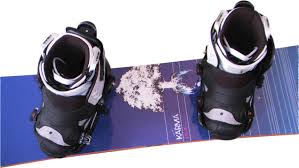
TIP #1: GET THAT GEAR!
You don’t need to buy the most expensive stuff to enjoy snowboarding. Re-use it centers, like the one in Whistler, have plenty of snowboards for cheap. There are also plenty of places to rent snowboard equipment in Whistler. Although investing in a new pair of boots is recommended (your own smelly zone).
TIP #2: CHOOSE YOUR STANCE & LEAN
FORWARD LEG:
Imagine that you are on an icy surface - run forward and slide – whichever foot goes forward, that is how you will stand on your board. In general, if you are left-handed, your right leg will be forward and vice versa, although not always. Try to slide on both legs and see what feels right for you.
STANCE STYLE :
There are two major ways to stand on a snowboard:
Duck stance - feet wider apart and toes pointing towards the board ends.
Directional stance - front leg like a duck and back leg in a similar direction towards the board center.
Again, go with whatever feels good, for your knees especially. Also, play with having your feet wider apart or closer. It is a smart idea to have someone experienced to set everything up for you so you can watch and learn how it’s done.
BINDINGS LEAN:
When it comes to binding lean, you can have your bindings set up in a way that you are forced to actually ride and stand in a squat, rather than being straight up like a stick. This, of course, brings some muscle challenge BUT it does help you to be in more control, as you are forced to stay lower. PLUS it allows you to absorb any snow irregularities and deal with whatever the hill brings. Try either and see what works for you.
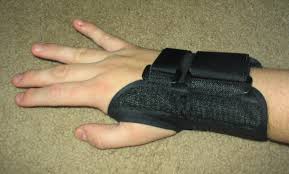
TIP #3: PROTECT YOUR BODY:
Be ready to fall a lot at the beginning, but don’t get discouraged. A helmet is a must, and wrist guards may not be a bad idea as that is the #1 injury for beginner snowboarders. The lower back also gets some hard hits, but that is when the deeper squat stand comes handy. The lower to the ground you are, the less you fall. Here is an idea, try stuffing your bum with a pillow or something like that………….joking.......hmm not really!
TIP #4: PRACTICE ON THE BEGINNER CHAIR
- Start practicing at the beginner's chair, which is slower, because you will need to learn how to snowboard on and off the lift. Exiting the chair can be especially difficult and stressful at the beginning because your back foot is unstriped and there are many people around the exit line, often making you fall.
- Next, riding on your heelside will be your first proper move, that is ride all the way down, on your heals, back on the chair and again heel side down the hill. Stick to this on your first day.
- Next day, do the same but toes only. This is because many people get stuck riding on the heels and find it scary to switch to toes. Start that way from the beginning, evenly, and you will find it easier to link these sides when the time comes.
TIP #5: PICK YOUR FAVORITE GREEN RUN IN THE ALPINE
- Once you are 100% confident with boarding on and exiting off the chairlift, you can take a full ride to the Alpine, which often involves some chair/gondola transfers. At least that is the case in Whistler. BUT since you have done your training, you are fully capable of doing this without being a hazard to anyone around you and to yourself too!
- As soon as you reach the mountaintop or even the mid station, it is time to pick a nice green run or more and practice your toe and heel linking. Remember, turning is learning. Go wide on your turns and never lose control (stay low, engage your core). Seeing others passing you by can be intimidating and at times stimulating (exciting), wanting you to match. The best thing you can do though is to be true to your own pace and practice your basics with focus and determination.
- Avoid riding straight lines at the start because toe & heel linking is what you really need to get under your skin. This will help you to deal with steeper, bumpier runs in the future as you will be able to "whip" your tail dynamically and with control.
OK, these are the basics in a nutshell. Have fun, be patient with yourself and have someone to teach you on your first days.The more you do it, the better it gets. Talent is one thing but practice makes perfect!
Good luck and stay safe!
Banner image: Mike Crane